
Your Spiff-enabled products can be integrated with many different websites and eCommerce stores while still being managed by your main Spiff Hub account.
This gives you the ability to control a group of products in a coherent manner for the purposes of experience and fulfilment within one main account, whilst maintaining the marketing independence required to expose those products to as many customers as possible by integrating them across a range of online stores.
Integrating Products
An Integration Product is a link from the Spiff Hub to the location (website) you want to display and market that product. The ability to create an integration product is located inside the Spiff product as seen below.
Navigate to: Store Product Third card down - Integrations Product.
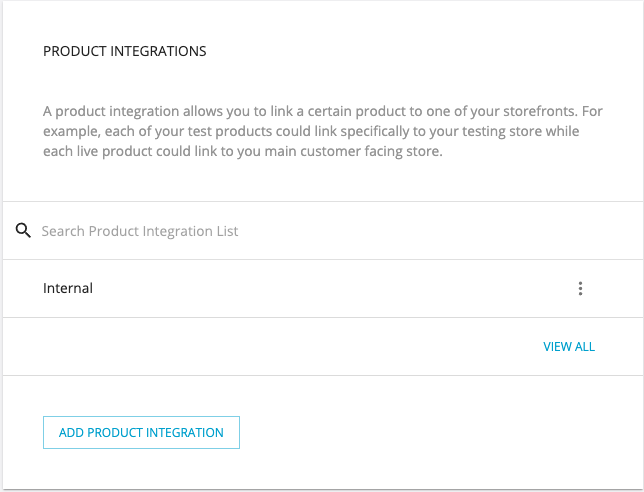
You will notice that you will automatically have an integration named internal. This is there to allow you to create internal orders and test your workflows within the Spiff Hub.
To create an integration product, click on add product integration
You will then be presented with a drop-down that will display all unlinked integrations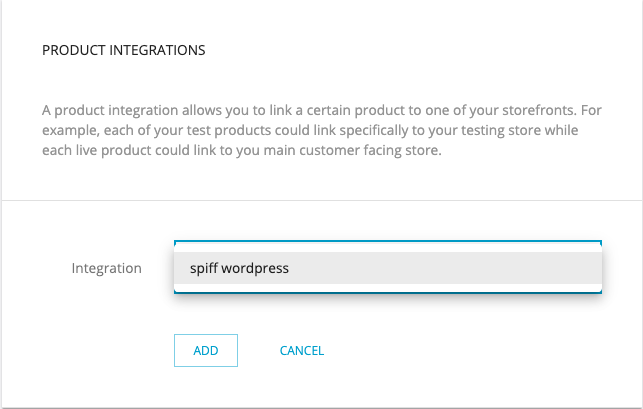
Once you have linked the Integration make sure you save the product, or if working with Shopify, enter your Shopify Product ID (see below)
Shopify
Integrating with Shopify is simple. In your Shopify admin account, navigate to your specified product. In the URL of this product, copy the ID at the end of the URL, for example: https://admin.shopify.com/store/spiff-dev/products/8023723081924.
When creating your new integration on your Spiff product now, add this in after selecting Shopify, in "External Product ID".
Adding Additional Products to Cart:
To automatically add an additional product to the cart (e.g., insurance, warranty, etc.), we need two things:
-
The Product ID
-
The Variant ID (even if the product only has one variant)
Here’s how to find them using the product edit page in your Shopify admin:
-
Open your Shopify Admin.
Go to Products and click on the product you want to use as the add-on (e.g., “Crash Replacement Insurance”). -
In the address bar, you’ll see a URL like this:
https://your-store.myshopify.com/admin/products/1234567890That number at the end is the Product ID.
-
Now, get the full JSON:
-
Copy that same URL and replace
/admin/products/with/products/. -
Add
.jsonto the end.
Example:
https://your-store.myshopify.com/products/1234567890.json -
-
Open that URL in Chrome.
-
Right-click and choose “View Page Source” or open Developer Tools.
-
Enable Pretty Print (curly brackets
{}icon) for easier reading.
-
-
Find the Variant ID:
-
Search for
"variants"in the JSON. -
Inside the first object in the
variantsarray, look for"id"– that’s the Variant ID.
-
📋 Example Output:
Crash Replacement Insurance:
Product ID: 1234567890
Variant ID: 9876543210
Now, where you added your main product ID, add these two ID's into the "Additional Product" inputs. Save, and test adding to cart now.
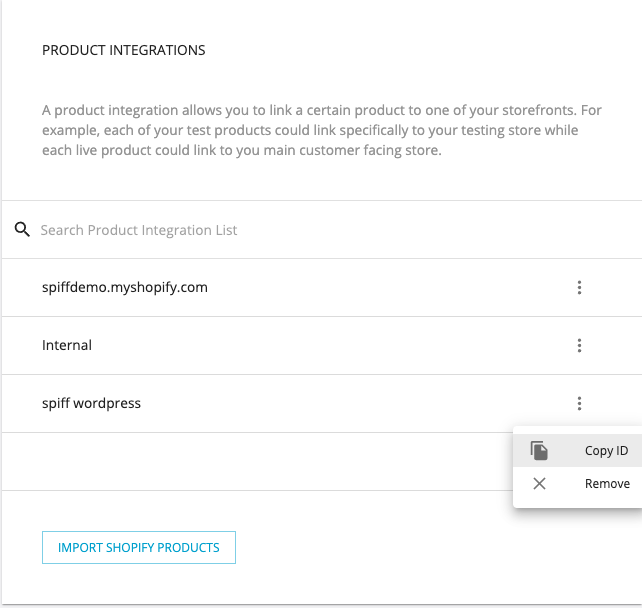
Then you can copy the Integration Product ID (for use in your store) in one of two ways:
Inside the product
By clicking on the ellipsis to the right of the integration you can copy the Integration Product ID and then paste it into the relevant area within the product page on your eCommerce site.
Inside the Integration
When you are inside the integration card
Scroll to the bottom and you will see all products linked to this integration
To the right of the relevant product, click on the vertical ellipsis and copy the integration product id
Then paste it into the relevant area within the product page on your eCommerce site.
