Once your account is approved, there are a few basic setup steps required to enable personalization or customization for your product range. While these components are best set up in order, they can be adjusted at any time, giving you flexibility in how you integrate with SpiffCommerce.
Follow this guide for a quick walkthrough on setting up your first custom product and linking it to your store.
____________________________________________________________________
Checklist
- Create a Product.
- Create a Workflow.
- Add a 3D model, built for your purposes.
- Link the product to your storefront.
____________________________________________________________________
Creating a Product
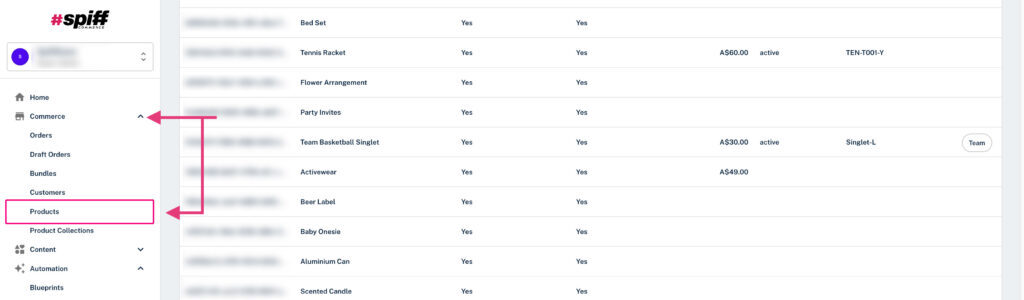
Once you’re signed in to your Spiff Hub—whether through the plugin on your ECommerce store or, as we recommend - directly via the appropriate URL for your region (AU/Asia Pacific or the US), access the Products list page via the navigation sidebar on the left, via Commerce>Products.
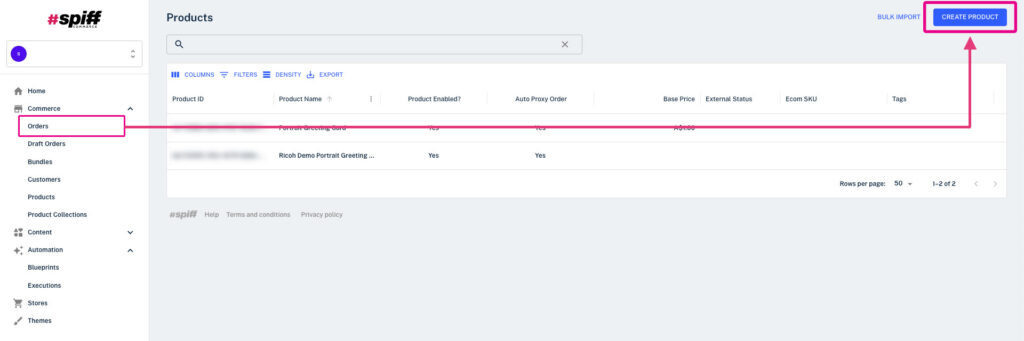
On this page, you'll see the default product that we include as an example product, the "Portrait Greeting Card" - use this at any time as a further reference for when you are building out your product, workflows, and more.
We'll start by creating our first product, using the button on the top right "Create Product".
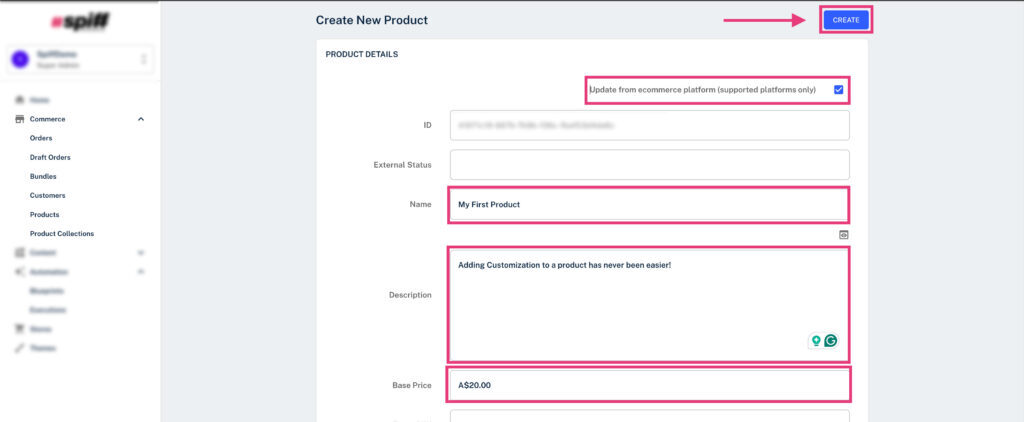
Add a product name, description, and price for now, and to save time in the future, use the toggle "Update from e-commerce platform" once linked. This feature automatically syncs your Spiff product details with your e-commerce product details.
If you already have a 3D model ready in Content > Assets, you can attach it to your new custom product here, though we’ll dive deeper into this process in the steps below. Once you've added the basic details for your product, finalize it with the Create button found in the top left, this will bring you to your newly created product.
____________________________________________________________________
Creating a Workflow
After creating your Spiff Product, the next step is to build your first workflow. Use the "create a workflow here" prompt as seen below to get started. Alternatively, for future workflows, you can easily create them via Content>Workflows, similar to how you created your first product.
In Spiff, the workflow acts as the foundation of your customization or personalization experience. It defines the steps your customer will take to create their custom product, the interactive options available to them, the artwork that’s generated, and more.
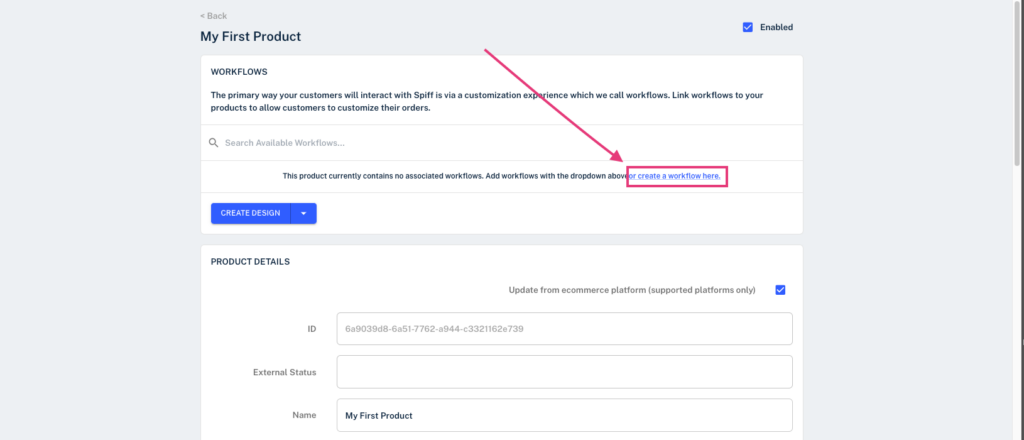
By designing a workflow and linking it to your product, you’re crafting the customer journey and shaping their overall experience for this product. Additionally, each product you offer can have a unique workflow, or multiple, enabling you to tailor these experiences to suit different products and requirements.
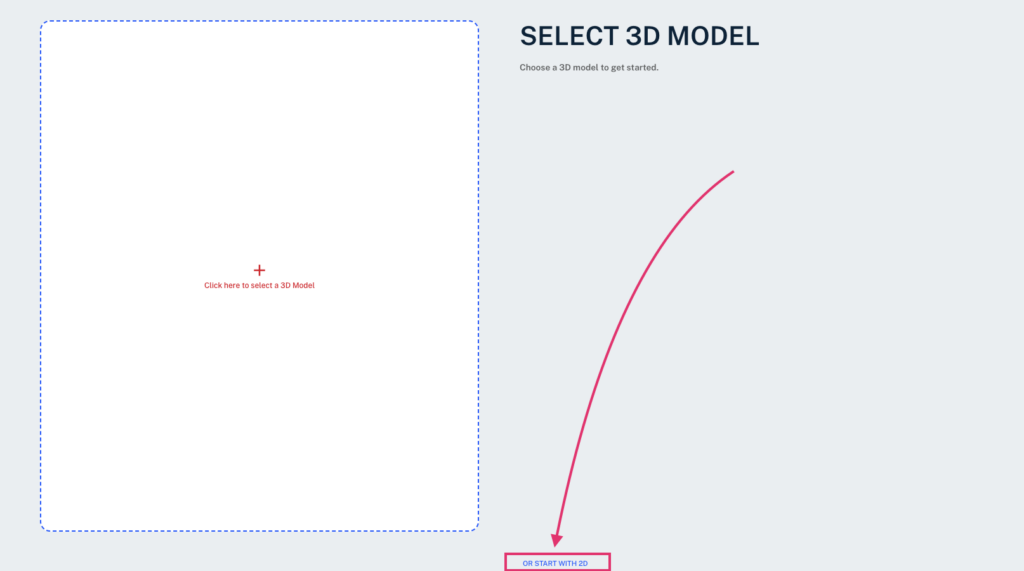
Select "Start With 2D" towards the bottom of the initial screen you see, or if you've added your 3D model to Content>Assets already, select it with the corresponding prompt to the left, we can skip this for now though.
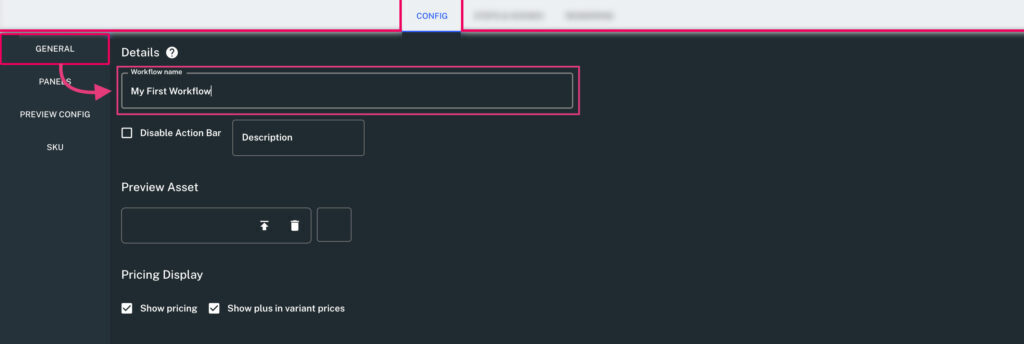
Presented with the Workflow Editor, you can now head over to the Configuration tab found in the top header. In General Settings, add a name for your Workflow, we'll then head to the Panels section to create our first canvas.